The subsequent step after the implementation of LED bulbs and lamps does have substantial expenses after their operation that are not the same as complications when they are installed into place. Hence, for this manual, we will consider the challenging process of effective LED bulb installation, giving useful advice for fitting your lamps properly.
Choosing the Right LED Headlights
Before choosing one or two LED bulbs for your vehicle, it is important to consider various issues to make sure everything runs smoothly.
This exploration involves critical components one needs to be careful about before implementing this big change.
1. Compatibility
The first thing to note when choosing the right set of LED lights is whether they can be installed into your vehicle or not. This includes determining the right bulb size and kind that fits your car’s make and model.
Whenever buying LED bulbs, always go through the manufacturer’s book for advice or use online compatibility tools to ensure that they are suitable for your car.
This step is crucial to avoid electrical issues, flickering, or malfunctions that may arise from incompatible components.
Compatibility ensures a seamless integration that enhances both performance and longevity, making It a fundamental consideration in the quest for optimal lighting upgrades.
2. Color Temperature
Color temperature in LED lights goes a long way in determining the aesthetic value and usability of your car’s exterior lighting mechanism.
To achieve a crisp, modern look with better visibility, use a color temperature of 5000k-6000k that is equally balanced out against cool white and warm yellows.
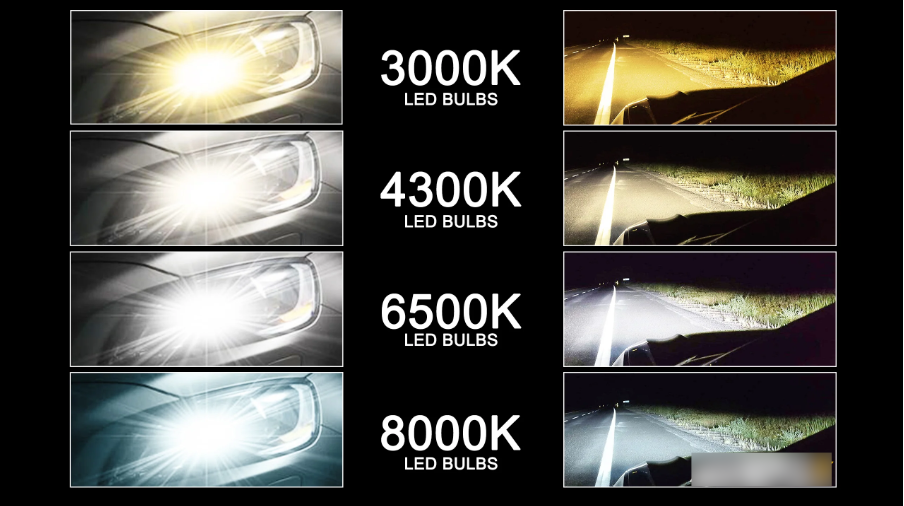
Adequate selection of color temperature enables you to customize your driving experience without compromising visual acuity and perception on the road.
3. Brightness
A very important attribute in enhancing visibility, especially at night, is the brightness of your headlights, which is measured in lumens or watts.
Although a higher luminance means more light, one should not overdo it as, according to the law, we can blind oncoming traffic with our high-beam headlamps.
Adjust the brightness level depending on the location where you use the vehicle, either for urban commutation or off-road adventure.
A good calibration of brightness promotes safety, besides improving the general looks of your car’s illumination.
4. Beam Pattern and Focus
LED lights’ effectiveness is based on their ability to accept to produce well-defined and focused beams. Install LED headlights with ideal lighting patterns that are spread over a large space of the highway while remaining non-glaring to other drivers.
Choose headlights that have been manufactured with precision optic technology to achieve uniformity for both the beam pattern and brightness of light along your path. Adjustable focus features also improve the sharpness of the beam pattern and enable you to tailor the brightness as per your driving situation.
Safety should be a very important consideration when choosing your LED headlight bulb, as the beam pattern should be clearly defined to avoid blinding approaching vehicles and pedestrians.
5. Ease of Installation
The allure that comes when you install LED headlight bulbs in your car’s interior is complemented by the prospect of a straightforward installation process. Choose the LED headlight bulb, which is accompanied by an easy installation manual and designed to be compatible with your car’s existing wiring.
Make sure that the LED headlight bulbs are small enough to fit easily and come with warranties guaranteeing quality and performance. It ensures that there are no obstacles during this process thus making It easier for you to embrace these advanced lights without having any special technical skills.
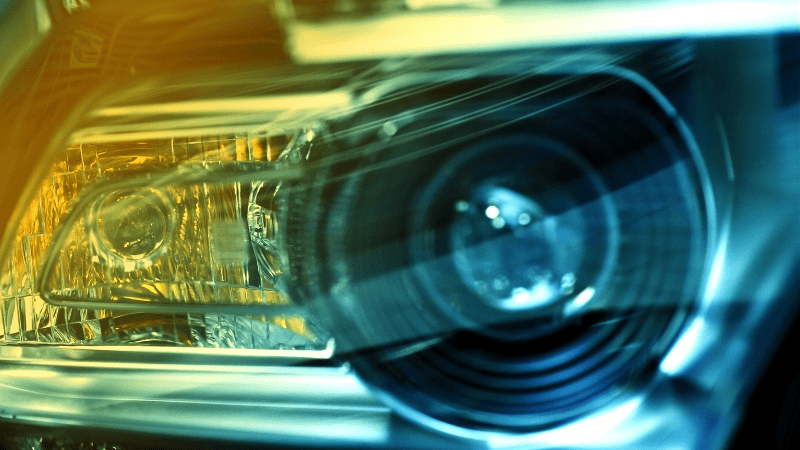
Understanding Your Vehicle’s Headlight Assembly
In this section, we’ll discuss the components of a headlight assembly and the types of headlights.
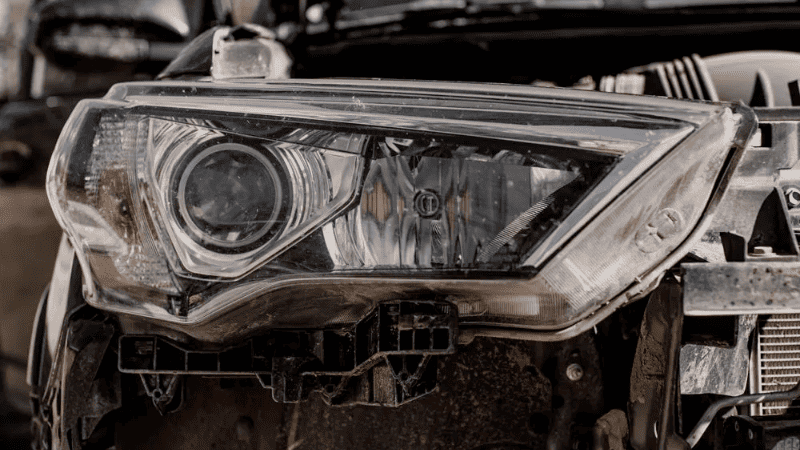
Components of the Headlight Assembly
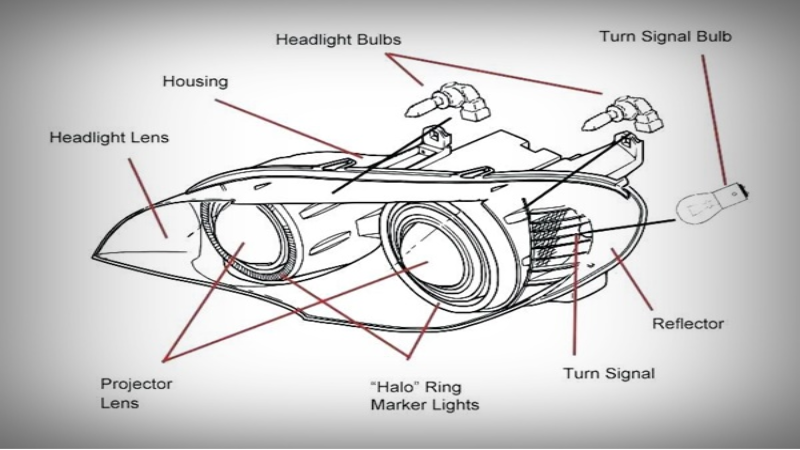
LED headlight bulb assembly Is an important part of a car’s lighting system which contributes greatly towards ensuring visibility at night.
It is made of different key parts that are crucial in providing effective LED lighting. Here’s an overview of the main components:
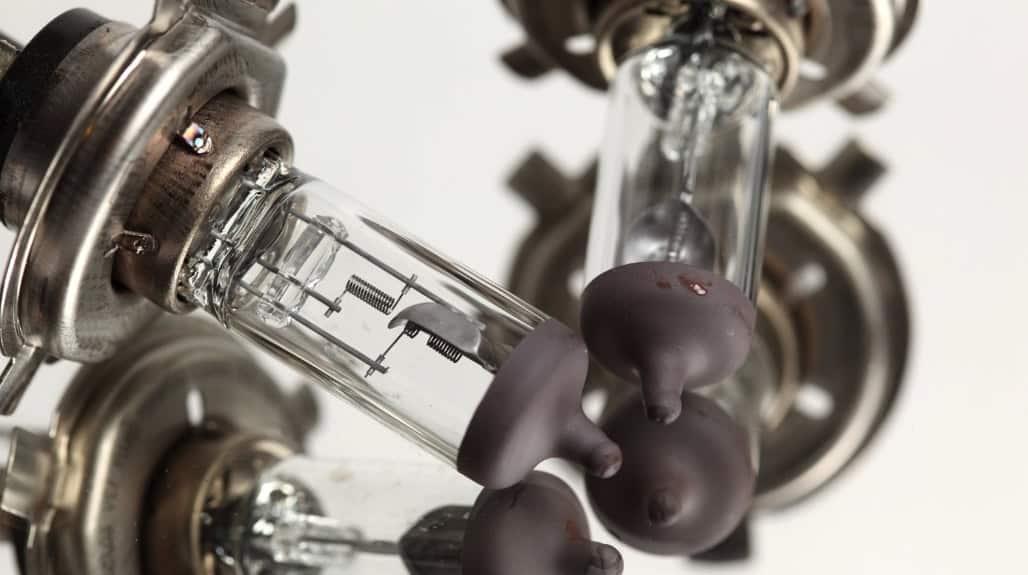
- Headlight Bulb:
The central part of a headlight consists of a bulb with a filament that lights up when electricity Is passed through it.
These types of light-bulb sources include a Halogen Bulb, an LED Bulb, and standard incandescent bulbs, all with different degrees of Illumination and reliability.
- Reflector:
A parabolic or curved plate that serves as a reflector is mounted behind the bulb of an LED headlight.
This unit’s purpose is to direct and reflect the light created by the LED bulb to generate a desirable beam pattern.
The design of this reflector must be correct for the efficiency and performance of the headlight.
- Lens:
It is a plastic cover placed at the very front of the headlight assembly that acts as an element shielding the bulb and the light reflector against dirt, water, or any other type of foreign object.
This material is mostly made up of polycarbonate which is resilient enough to remain see-through for light permeation.
Moreover, some lenses even have a special coating to ensure they are not affected by yellowing, hazing, and UV discoloration during use for long periods.
- Housing:
The outer shell or casings that cover the whole LED lighting assembly are referred to as the headlight housings.
It offers support, safeguards inner elements from damage, and ensures that car parts are fixed properly. The housing further helps in enhancing the vehicles’ frontal appearance.
- Adjustment Screws:
The LED lights typically have these screws, which are normally found at the back of the headlight assembly, that can be adjusted manually.
Proper alignment ensures that, be it the brake lights or fog lights, they shine on the road in the right direction and do not cause a glare on other motorists.
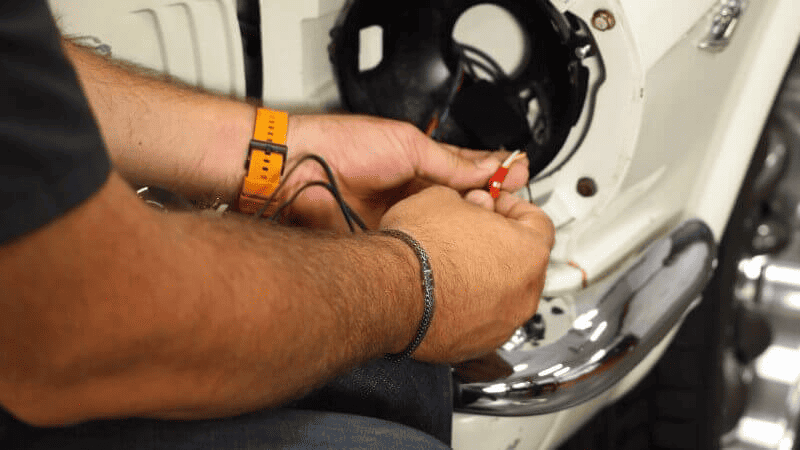
- Wiring and Connectors:
A series of links, such as wiring and connectors, ensure that the LED light assembly is connected to the electrical system of a vehicle.
These components guarantee a dependable and safe electrical link, enabling smooth light operations.
Types of Headlights
Different kinds of vehicle headlights have unique properties and strengths. Here are some common types of headlights:
- Halogen Headlights:
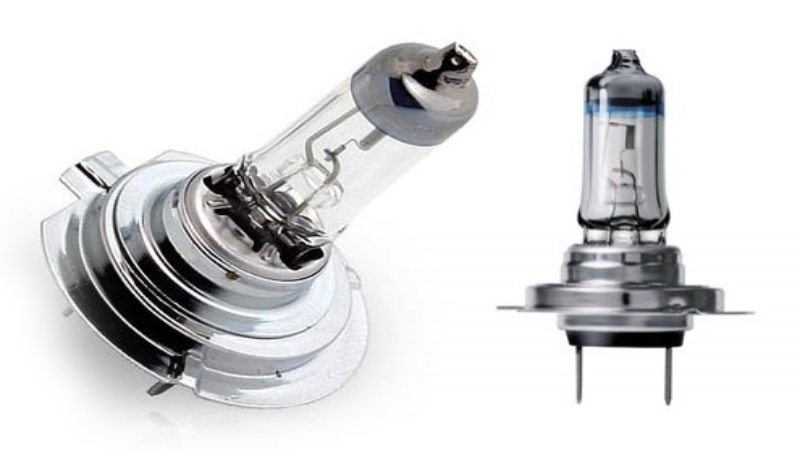
Halogen bulbs have been the industry norm for years in the automobile industry.
Halogen bulbs work by allowing the flow of electricity through a tungsten filament and within the halogen gas, which results in lighting, making the halogen bulb emanate light when it is on.
It is one of the cheapest headlights with pleasant yellow illumination.
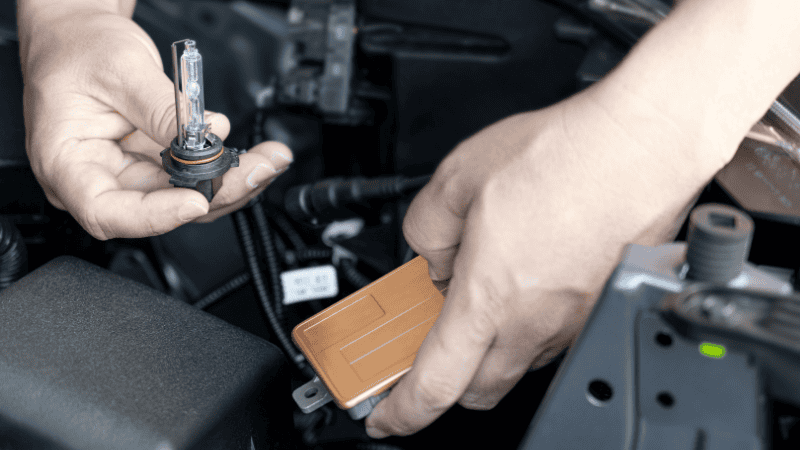
- HID Headlights:
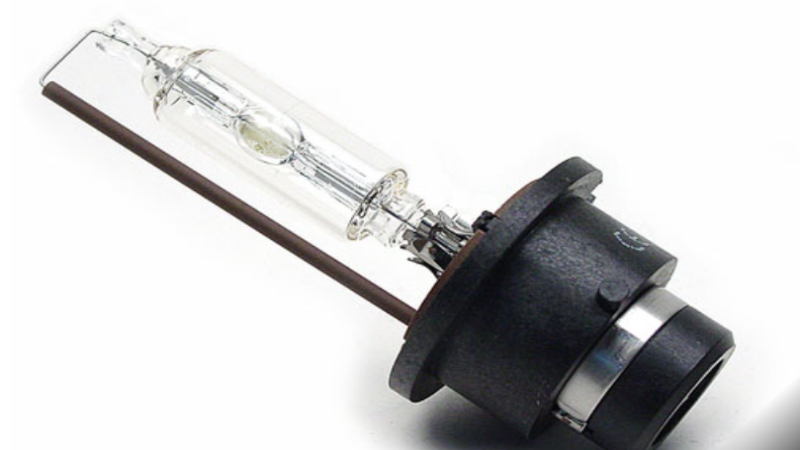
The HID bulbs are also known as xenon headlights, which discharge a very powerful voltaic of electric electricity, causing a bright light wave.
They consume less energy than halogen bulbs and emit cooler bluish-white light, making them correlated with efficiency and durability.
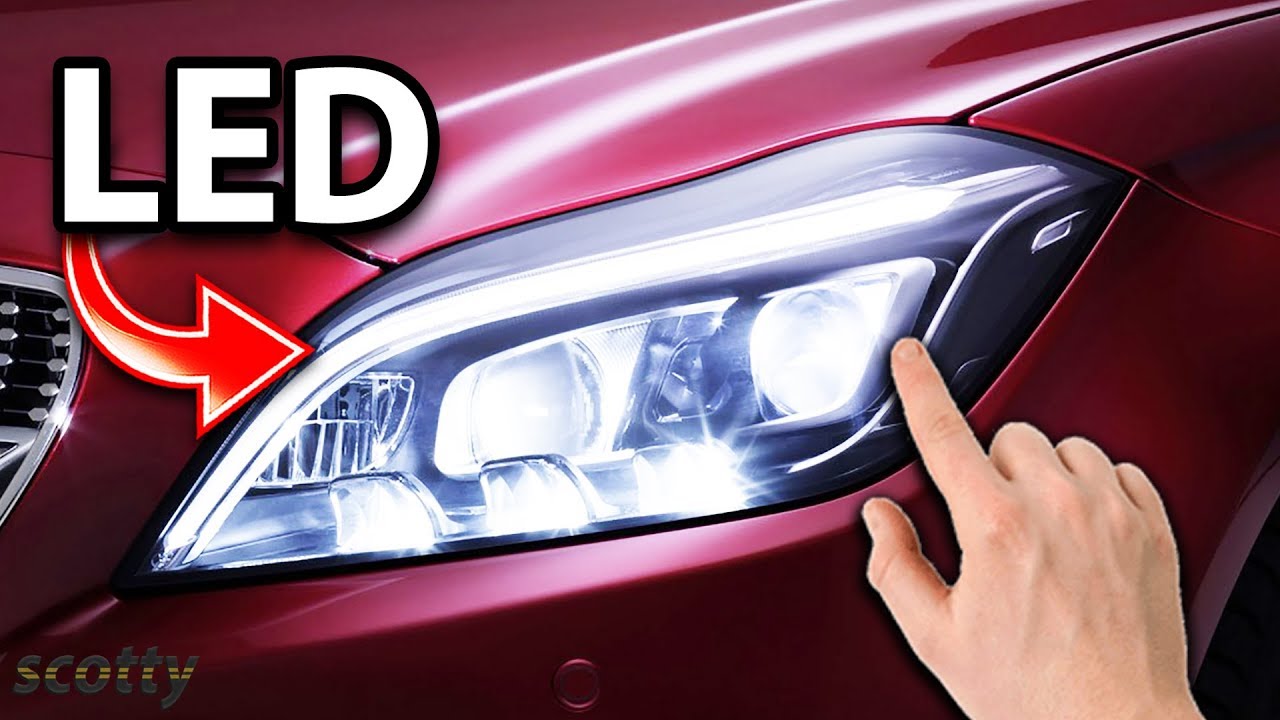
- LED Headlights:
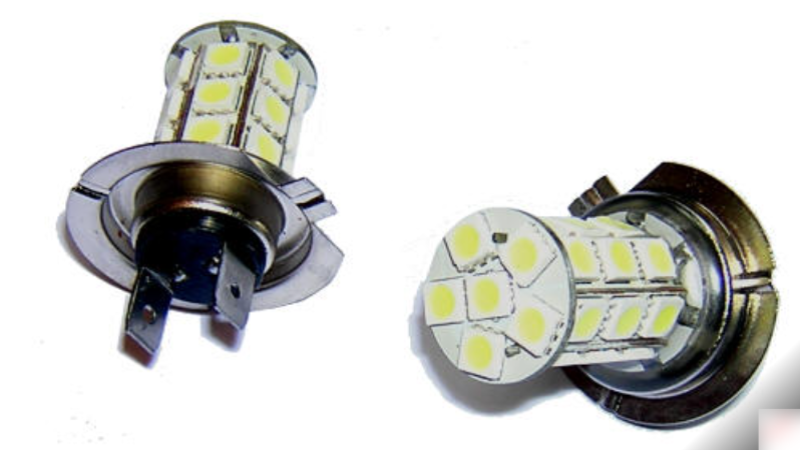
Due to high efficiency, longer lifespan, and small sizes, LED lights are becoming a popular thing for usage among car owners.
These LED lights are manufactured using semiconductors present within LED bulbs and generate light upon the flow of electricity through them.
These LED bulbs provide pure, sharp, white radiance and are usually employed in contemporary automobiles due to their economical design and versatility.
- Laser Headlights:
Laser headlights, unlike an LED headlight bulb, use a laser diode to generate light that passes through a phosphorous material to result in a brighter and more efficient lighting source.
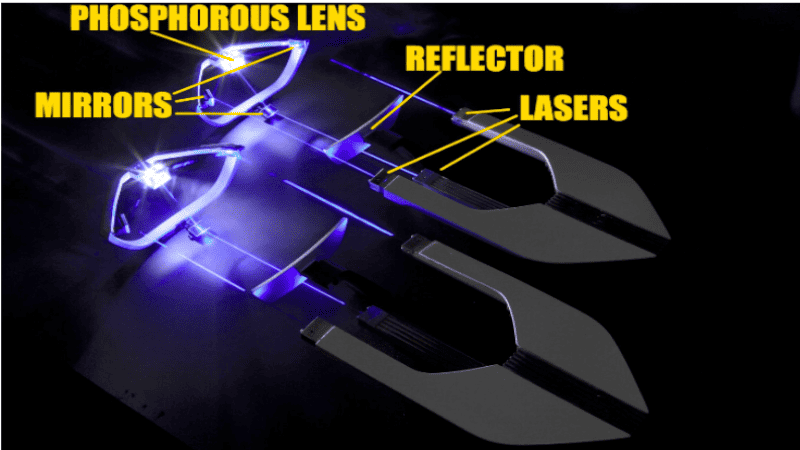
Although laser beams provide good visibility at a long range and low wattage consumption, they are not yet widespread because of the high price and the low beam from their bulb.
Gathering Necessary Tools and Materials
A highly sophisticated arsenal of appliances and materials is necessary during the installation of new LEDs.
Below is a checklist of the components needed as you install LED headlights.
- LED Headlight Kit:
An LED bulb kit is among the vital aspects required in your upgrade; as it comes with quality-made LED bulbs suited for automobiles.
Find a kit that will work effectively with your vehicle’s model to last long after installation and fit your lighting upgrades.
Compared to the traditional halogen bulb, an LED bulb has higher intensity coupled with increased efficiency.
- Basic Hand Tools:
A standard set of hand tools such as screwdrivers, pliers, and wrenches is imperative when you choose to replace old headlight components and install a new LED bulb.
These pieces help to take apart and put back together the headlight case that houses your LED bulb.
- Safety Equipment:
Safety is always a topmost concern. Ensure you wear gloves and safety glasses so you don’t injure your hands and protect your eyes while installing it.
Heat can be generated by LED headlights, and therefore, extra safety precautions should be taken with the use of other safety gear.
- Wire Strippers and Connectors:
It involves ensuring that power connections in your vehicle are precise and secure. Quality connectors ensure electrical joins and wire strippers expose wires at the needed connection length.
Well-crimped and insulated connections eliminate electrical problems and make the whole installation durable.
- Zip Ties and Electrical Tape:
Tidy and clean wiring looks neater and is safer, reducing risks. The wires are fastened with zip ties and electrical tape to not hang or grate against other parts of the device. This provides for a clean and safe installation that is durable enough to endure the stress of riding.
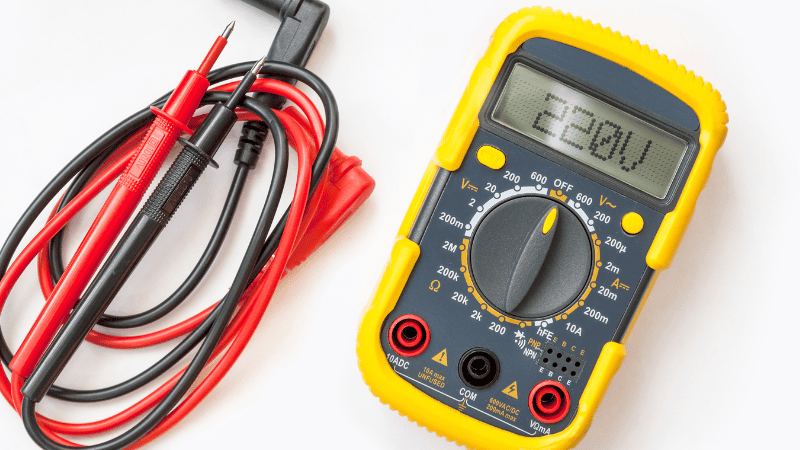
- Multimeter:
Multimeters are very useful tools used to measure car voltage, current, and resistance. This assists in locating possible flaws and ensuring that the electric components function correctly.
You can use it to verify the connections and find a potential faulty source in case of electricity supply systems’ failure either during or after installation.
Pre-installation Preparations
Before Installing LED headlight bulbs, you need to pay attention to the following preparations:
- Suitability: Make sure the LED bulbs used for the headlights fit properly to a particular vehicle type.
- Power Off: Switch off the car while it’s still in the parking, and subsequently remove the battery before replacing the lights.
- Tools: Do not forget to have at hand the accessories you may require for installations, such as a nuts wrench, driver, and wire cutter, appropriate for your vehicle spare parts.
- Cleaning: Wash thoroughly so that there is no dust, oil, or dirt on the light surface of the car for the bulb to glow brighter.
- Disassembly: Sequentially follow the lighting fixture manual or user handbook to dismount and remount the old car lamp block.
- Check: A person should ensure that every wire and its joints are properly connected before installing a new LED headlight.
Step-by-Step Installation Process
Installing LED headlights involves several steps to ensure successful and safe light upgrades. Here’s a general step-by-step guide
Step 1: Gather Tools and Materials
Ensure you have everything required for the installation, including any additional elements you might need for your headlight revolution.
Step 2: Refer to Vehicle Manual
Ensure you have gone through the recommended procedures and precautions for headlight replacement as stated in your car’s manual before you start.
If possible, also note any recommendations or requirements specified by the manufacturer.
Step 3: Prepare the Workspace
Put your vehicle on an even ground, shut off the engine, and apply emergency brakes. Ensure the headlights are off. Open the hood and disconnect the car’s battery before performing any work during the installation processes for security reasons
Step 4: Remove the Old Headlight Bulbs
Be very cautious while examining the installed headlight bulbs. This depends on your vehicle and should either involve the removal of the headlight housing covers or gaining access to the bulbs from the engine bay. Apply correct tools for removal of the old bulbs but without touching their glasses with bare hands.
Step 5: Install the LED Headlight Bulbs
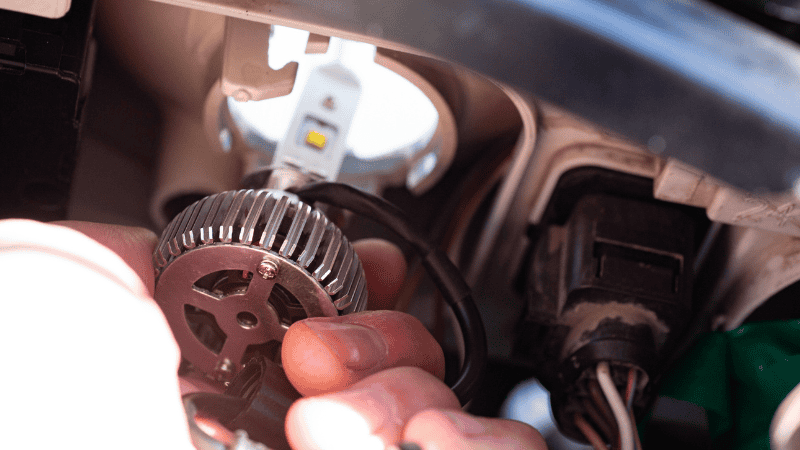
Slide the new LED bulbs into the headlight housing and make sure they fit correctly. Follow the detailed guidelines that accompany the LED headlight kit. To make sure it functions properly, double-check on its polarity.
Step 6: Secure Wiring and Components
Ensure that you use zip ties to tidy up the wirings and avoid interfering with other vehicle parts. Wrap the exposed wires and wire connections using electrical tape. Ensure all parts and loose joints are fixed in positions where they cannot move to avoid vibrations or shocks.
Adjusting Beam Alignment
Properly adjusting the beam alignment of your vehicle’s headlights Is crucial to ensure optimal visibility without causing glare for oncoming drivers.
Here’s a step-by-step guide on how to adjust the beam alignment:
Step 1: Park on a Level Surface
Make sure that your car Is stationed on flat ground with the front facing an upright wall or garage door which is parallel to the ground. Your vehicle should be approximately twenty feet away from the wall for proper adjustments.
Step 2: Turn On Headlights

Switch the headlights on to activate those beams that you will be adjusting. This offers an anchor point for reference toward alignment.
Step 3: Vertical Adjustment
Adjust the heights of the headlight beams by employing a vertical adjustment screw. Alter the lights to have the peak of the light pattern almost at head level, as measured above in the second paragraph. It ensures that the beam lights up the road while avoiding dazzling other drivers coming from other directions.
Step 4: Horizontal Adjustment
Align the headlight beams horizontally using the horizontal adjustment screw. Best of all, the brightest part of the beam pattern should be centered horizontally, ensuring equal lighting on either side of the street. Make necessary adjustments and align them to restore symmetry.
Step 5: Check for Symmetry
Take a few steps backward and see if your headlight beams are straight. Ensure that the two rays are straight and well-aligned. One would have to optimize adjustments to get a symmetrical and homogeneous intensity.
Troubleshooting Common Installation Issues
The installation of an LED bulb may come with several challenges; hence, proper troubleshooting should be done to promote maximum efficiency and assurance
Here are common issues and steps to address them:
1. Flickering or Flashing:
Poor electrical connections and Incompatibility of components can lead to flickering LED headlights.
Ensure you use a secure connection and that your LED kit works with the wiring system of your vehicle.
If this persists, fit an anti-flicker harness onto your vehicle, and If not consult a professional who can run further tests.
2. Uneven Beam Pattern:
Improper mounting or alignment causes uneven beam patterns. Rework the Installation to ensure the LED bulbs have been firmly placed into the headlight fixture.

Ensure It is symmetric, then use the headlight adjustment screws to make adjustments on the beams and search for the perfect location.
If problems persist, take time to re-read your vehicle’s manual on alignments or simply visit automotive mechanics.
3. Dim or Insufficient Light Output:
Dim or inadequate lighting could result from a poor electrical connection of bulbs of bad quality that do not fit well with each other.
Check on the wires you are Installing, and find out which components are broken to ensure that you connect them with the right car specification.
Consider replacing old bulbs with modern LED ones that provide enough lumens, and consider consulting professionals if the issue persists.
4. Overheating:
Led headlights may heat up if they are not sufficiently vented. Ensure that there is enough air ventilation for the bulbs and that the bulbs will be correctly housed in your vehicle.
Consider upgrading to LED bulbs with built-in cooling solutions or externally added heat sinks If the heating does not subside.
Do not use bulbs with wattages exceeding the recommended specifications, as they might add up to overheating problems.
Conclusion
The choice of headlight bulbs in your car has a direct impact on the safety as well as the aesthetics of your auto. As long as you have the relevant instruments together with the detailed approach, you shall smoothly install the reflective material and enhance perception on the roadsides.
However, in selecting your LED headlights, always put Ease Of Installation first on top of all the other important tips.
Buy High-Quality LED Headlights from Carlightvision
Please do not hesitate to contact us if you need more information or wish to share the experience that has been gained by practicing the steps provided earlier. Therefore, our community exists as a means of helping you take the first step on the path toward getting the ideal LED headlight configuration.